 Livia Scott
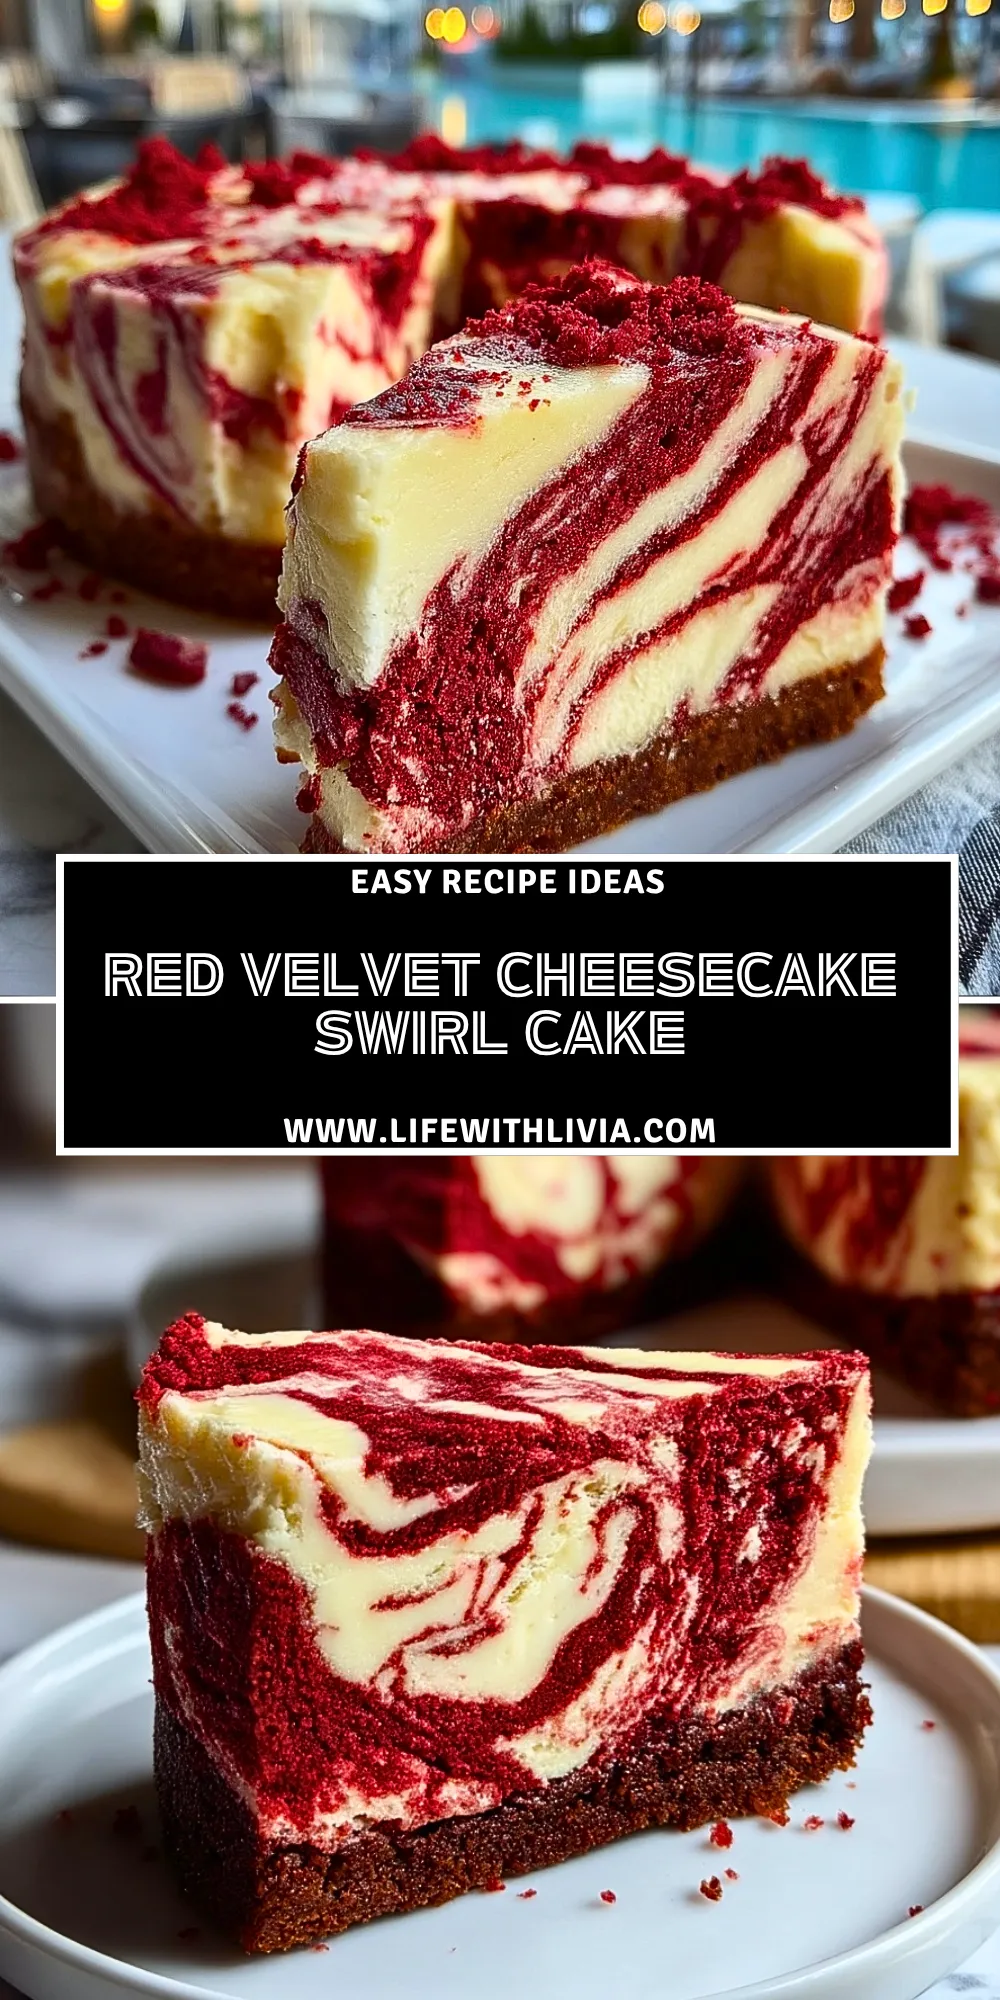
Red Velvet Cheesecake Swirl Cake is the kind of dessert that looks bakery-level the moment it hits the table. Each slice has deep cocoa-red cake ribbons, creamy cheesecake swirls, and a tender crumb that feels rich without being heavy. It is dramatic enough for holidays, birthdays, Valentine’s Day, Christmas dessert trays, or any dinner where you want the final course to feel special.
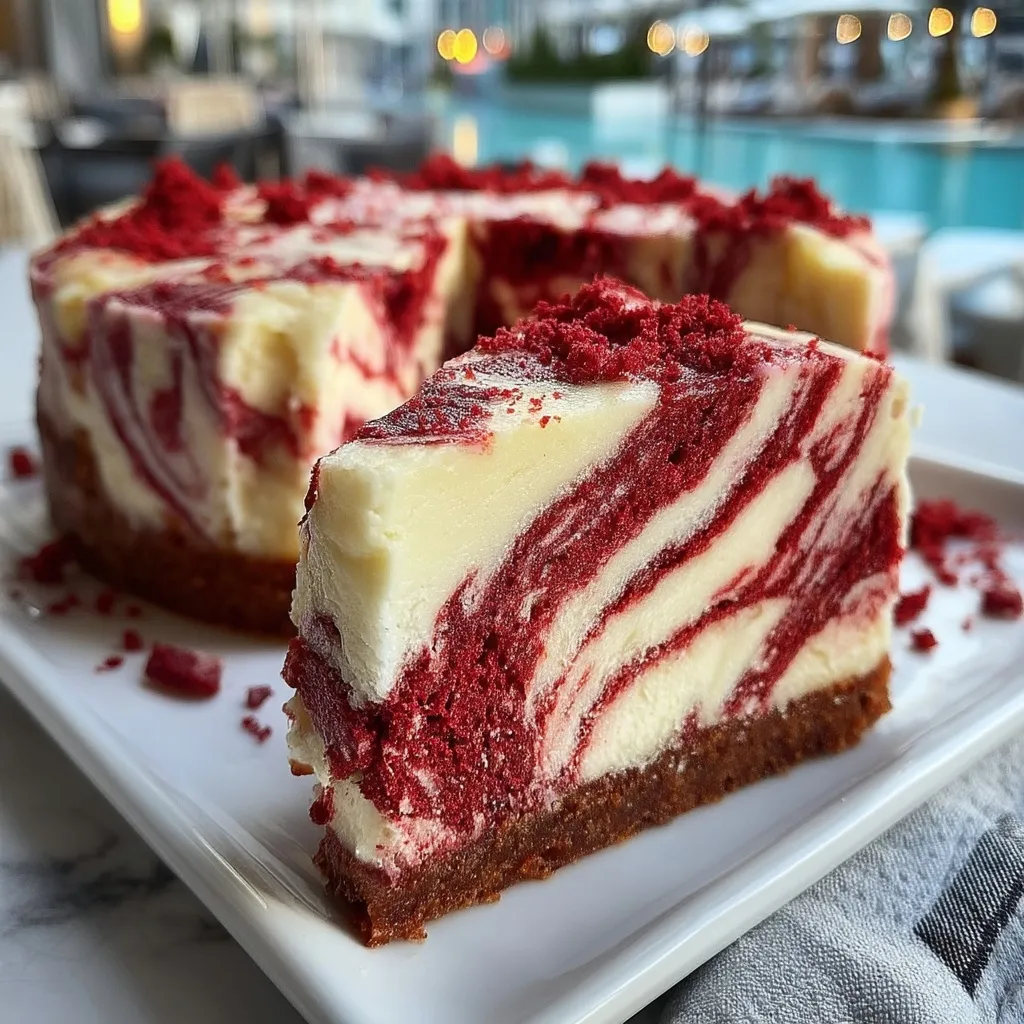
The magic is in the contrast: red velvet brings a soft cocoa flavor and gorgeous color, while the cheesecake layer adds tang, creaminess, and that marbled look everyone notices first. Serve it chilled for clean slices and a dense cheesecake feel, or let it sit briefly at room temperature for a softer, more cake-like bite.
Why You’ll Love This Red Velvet Cheesecake Swirl Cake
This Red Velvet Cheesecake Swirl Cake gives you two desserts in one pan: a moist red velvet cake and a creamy cheesecake swirl baked together. The result is rich, colorful, and festive, but still approachable for a home baker.
It is also a wonderful make-ahead dessert because the flavor improves as it chills. That makes it especially useful for parties, potlucks, and holiday meals when you want dessert finished before guests arrive. The swirl pattern looks impressive, yet it does not need perfect decorating skills, frosting bags, or a complicated finish.
What Makes the Cheesecake Swirl So Creamy?
The cheesecake swirl stays creamy because it uses softened cream cheese, sugar, egg, and vanilla mixed until smooth before it is layered with the red velvet batter. Softened cream cheese matters here; cold cream cheese can leave small lumps that do not fully disappear during baking.
A gentle swirl is also important. Instead of mixing the batters together completely, drag a knife or skewer through the layers just a few times. This keeps the red velvet and cheesecake distinct, creating bold ribbons instead of a muddy pink batter.
Ingredients
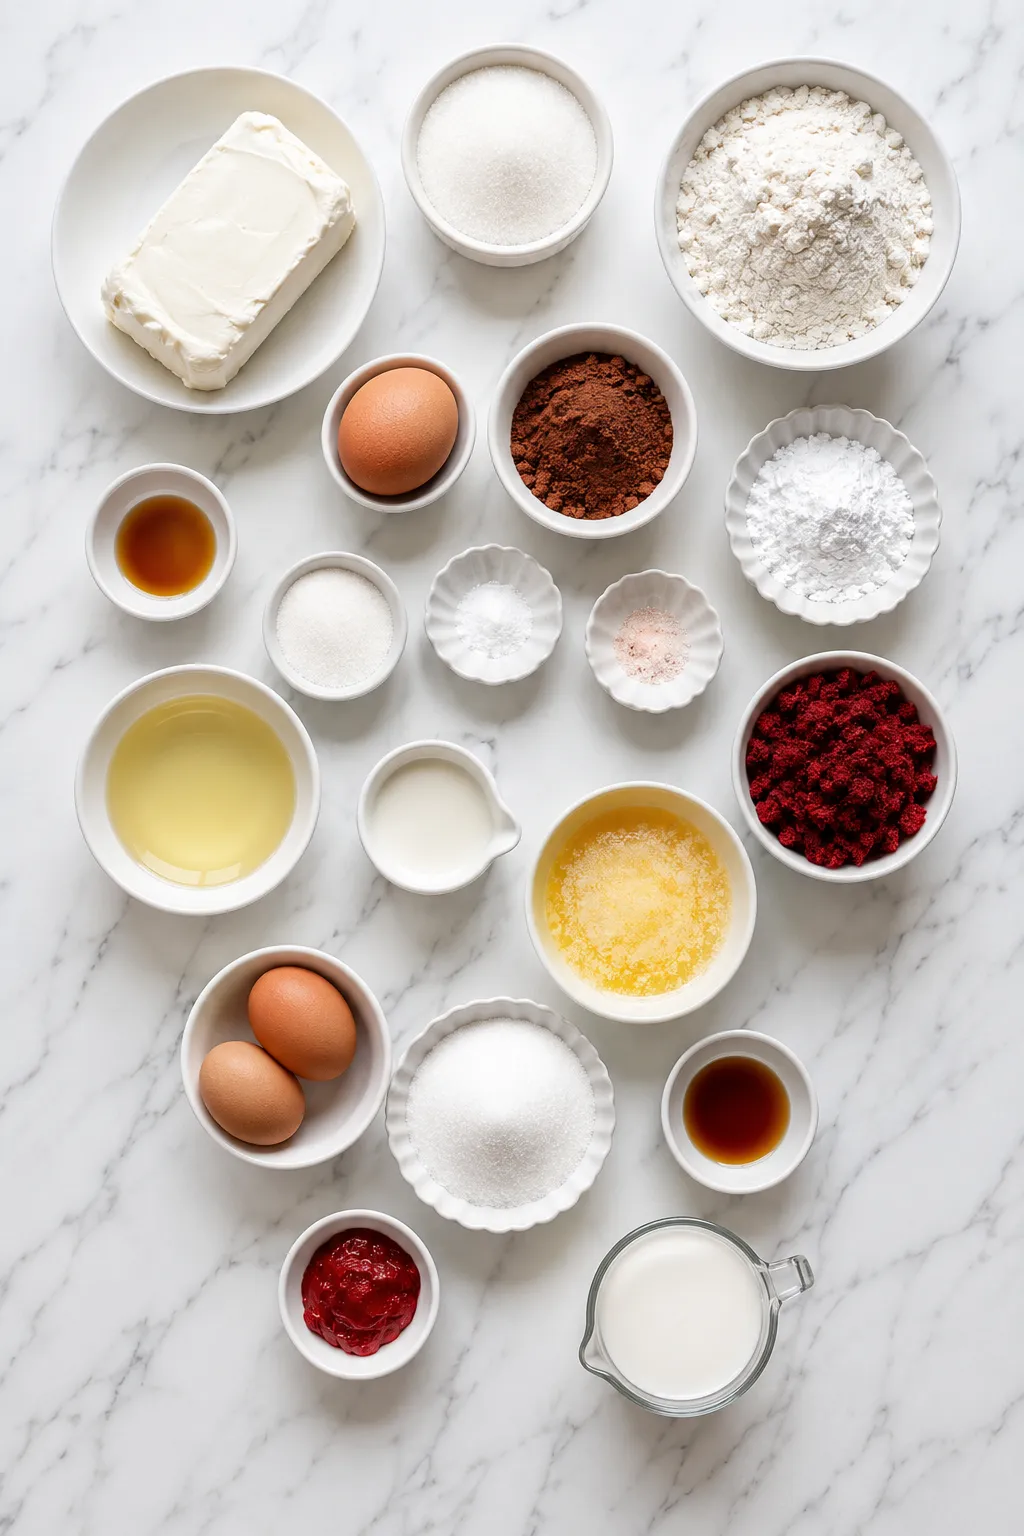
These ingredients work together to create a moist red velvet base, a tangy cheesecake ribbon, and a soft cake structure. The exact measurements are saved for the printable recipe card below.
- Cream cheese — Use full-fat block cream cheese for the smoothest, richest cheesecake swirl.
- Granulated sugar — Sweetens both the cheesecake filling and the cake batter while helping with tenderness.
- Eggs — Give structure to the cake and help the cheesecake layer set properly.
- Vanilla extract — Adds warmth and rounds out the cocoa and cream cheese flavors.
- All-purpose flour — Provides the structure needed for a sliceable cake.
- Unsweetened cocoa powder — Gives red velvet its gentle chocolate note without overpowering the cheesecake.
- Baking soda — Helps the cake rise and keeps the crumb light.
- Salt — Balances sweetness and strengthens the overall flavor.
- Buttermilk — Adds tang, moisture, and the classic red velvet tenderness.
- Vegetable oil — Keeps the cake moist, especially after chilling.
- Butter — Adds richness and a soft, rounded flavor to the red velvet batter.
- Red gel food coloring — Creates a strong red velvet color without thinning the batter too much.
- White vinegar — Reacts with the baking soda and supports the tender red velvet texture.
- Powdered sugar — Optional for dusting the finished cake with a delicate bakery-style finish.
- Red velvet cake crumbs — Optional topping for extra color, texture, and a pretty presentation.
How To Make the Red Velvet Cheesecake Swirl Cake
This cake is built in layers, then gently swirled so every slice shows off the red velvet and cheesecake pattern. Take your time with the mixing and do not over-swirl once the batters are in the pan.
Step 1: Prepare the Pan and Oven
Preheat the oven and line the bottom of a springform pan or deep round cake pan with parchment paper. Grease the sides well so the cake releases cleanly after cooling. A springform pan is helpful because the cheesecake swirl makes the cake delicate when warm.
Step 2: Make the Cheesecake Filling
Beat softened cream cheese with sugar until smooth and creamy. Add the egg and vanilla, then mix just until combined. Scrape down the bowl so no thick cream cheese pockets remain. Set the filling aside while you prepare the red velvet batter.
Step 3: Mix the Dry Ingredients
In a separate bowl, whisk the flour, cocoa powder, baking soda, and salt. This evenly distributes the cocoa and leavening so the cake bakes with a consistent texture and color.
Step 4: Mix the Wet Ingredients
In a large bowl, combine the sugar, oil, melted butter, eggs, vanilla, buttermilk, vinegar, and red gel food coloring. Whisk until the mixture looks smooth and evenly red. Gel coloring gives the best color without adding too much liquid.
Step 5: Bring the Red Velvet Batter Together
Add the dry ingredients to the wet ingredients and mix only until the flour disappears. Overmixing can make the cake dense, so stop as soon as the batter looks combined. The batter should be smooth, pourable, and richly colored.
Step 6: Layer the Batters
Spread part of the red velvet batter into the prepared pan. Spoon some of the cheesecake filling over the top, then repeat with more red velvet batter and more cheesecake filling. Try to distribute the cheesecake in spoonfuls rather than one thick layer so it swirls evenly.
Step 7: Create the Swirl
Run a butter knife or skewer through the batter in loose figure-eight motions. Keep the movement gentle and shallow enough to create ribbons. A few passes are enough; too much swirling will blend the colors together.
Step 8: Bake Until Set
Bake until the edges are set, the center has a slight wobble, and a toothpick inserted into a red velvet section comes out with moist crumbs. Avoid testing directly through a cheesecake pocket because it will naturally look creamier.
Step 9: Cool Slowly
Let the cake cool in the pan before removing the ring or turning it out. A slow cool helps the cheesecake swirl settle and reduces cracking. Once the cake reaches room temperature, chill it until firm for the neatest slices.
Step 10: Finish and Slice
Dust lightly with powdered sugar or add red velvet crumbs on top if desired. Use a sharp knife dipped in warm water and wiped clean between cuts for smooth, defined slices.
How to Serve Red Velvet Cheesecake Swirl Cake
This Red Velvet Cheesecake Swirl Cake feeds about 10 to 12 people, depending on how thick you cut the slices. Because it is rich and creamy, smaller slices work beautifully, especially after a full meal.
Serve it chilled for the cleanest cheesecake-style texture. For a softer bite, let slices sit at room temperature for about 15 minutes before serving. It pairs well with hot coffee, black tea, cold milk, fresh strawberries, raspberries, or a small spoonful of whipped cream. For a holiday dessert table, add a few extra red velvet crumbs or white chocolate curls on top for a polished finish.
How to Store Red Velvet Cheesecake Swirl Cake
Because this cake contains a cheesecake layer, it should be stored in the refrigerator. Place it in an airtight container or cover the pan tightly with plastic wrap. It will keep well for up to 5 days when chilled properly.
For the best texture, wait to add powdered sugar until just before serving because it can dissolve in the refrigerator. If the cake has been sliced, press a small piece of parchment or plastic wrap against the cut sides to help prevent drying.
You can also freeze this cake. Wrap individual slices tightly in plastic wrap, then place them in a freezer-safe bag or container. Freeze for up to 2 months. Thaw overnight in the refrigerator, then let the slice sit briefly at room temperature before serving for a creamier texture.
Frequently Asked Questions
Can I make Red Velvet Cheesecake Swirl Cake ahead of time?
Yes, this cake is an excellent make-ahead dessert. In fact, chilling helps the cheesecake layer set and makes the flavors taste more developed. Bake it the day before serving, cool it completely, refrigerate it overnight, then slice when fully chilled.
Why did my cheesecake swirl sink?
The swirl can sink if the cheesecake mixture is too loose, the red velvet batter is too thin, or the filling is added in one heavy layer. Spoon the cheesecake filling in smaller dollops between layers of batter, then swirl gently. Full-fat block cream cheese also helps create a thicker filling that holds its shape better.
Can I use liquid red food coloring instead of gel?
You can, but gel food coloring is preferred because it gives stronger color with less liquid. Liquid coloring may require more product to achieve the same red shade, which can slightly affect the batter consistency. If using liquid coloring, add it gradually until the color looks right.
How do I know when the cake is done?
Look for set edges and a center that jiggles slightly rather than sloshes. A toothpick inserted into the cake portion should come out with moist crumbs. Remember that the cheesecake pockets will look creamier than the cake, so test in a red velvet area for the best reading.
Can I bake this as bars instead of a round cake?
Yes, this can be baked in a square or rectangular pan for cheesecake swirl cake bars. The bake time may be shorter depending on the pan size and batter depth. Start checking early, and chill completely before cutting so the bars hold clean edges.
Want More Cheesecake Dessert Ideas?
If this Red Velvet Cheesecake Swirl Cake is your kind of dessert, you’ll probably enjoy these other creamy, colorful treats too:
- Red Velvet Cheesecake Brownies for the same red velvet and cheesecake combo in a fudgy bar.
- Sugar Cookie Cheesecake when you want a sweet, creamy dessert with a cookie-inspired twist.
- No-Bake Turtle Mini Cheesecake for a caramel, chocolate, and pecan cheesecake bite.
- Layered Pumpkin Cheesecake for a cozy seasonal cheesecake with beautiful layers.
For even more daily dessert inspiration, visit Life With Livia on Pinterest.
Save This Pin For Later
📌 Save this Red Velvet Cheesecake Swirl Cake to your Pinterest dessert board so you can come back to it whenever you need a stunning cake for a celebration.
And let me know in the comments how yours turned out. Did you add extra red velvet crumbs on top, serve it with berries, or keep it simple and chilled?
I love hearing how others make these desserts their own. Questions are welcome too—let’s help each other bake sweeter, cleaner, and more confidently.
Print Red Velvet Cheesecake Swirl Cake
- Total Time: 5 hours 20 minutes
- Yield: 10 slices
- Diet: Vegetarian
Description
This Red Velvet Cheesecake Swirl Cake is a show-stopping dessert with moist red velvet cake, creamy cheesecake ribbons, and a beautiful marbled finish in every slice. It is perfect for holiday desserts, birthday cake ideas, Valentine’s Day treats, Christmas dessert tables, easy cake recipes, cheesecake desserts, party food ideas, and make-ahead dessert recipes.
Ingredients
1 cup full-fat cream cheese, softened
1/4 cup granulated sugar for cheesecake filling
1 large egg for cheesecake filling
1 teaspoon vanilla extract for cheesecake filling
1 1/2 cups all-purpose flour
2 tablespoons unsweetened cocoa powder
1/2 teaspoon baking soda
1/2 teaspoon salt
3/4 cup granulated sugar for cake batter
1/2 cup vegetable oil
1/4 cup unsalted butter, melted
2 large eggs
1 teaspoon vanilla extract
3/4 cup buttermilk
1 teaspoon white vinegar
1 tablespoon red gel food coloring
2 tablespoons powdered sugar for topping, optional
1/4 cup red velvet cake crumbs for topping, optional
Instructions
1. Preheat the oven to 325°F and grease a 9-inch springform pan. Line the bottom with parchment paper.
2. Beat the softened cream cheese and sugar until smooth and creamy.
3. Add the egg and vanilla to the cream cheese mixture, then mix until just combined. Set aside.
4. In a medium bowl, whisk together the flour, cocoa powder, baking soda, and salt.
5. In a large bowl, whisk the sugar, oil, melted butter, eggs, vanilla, buttermilk, vinegar, and red gel food coloring until smooth.
6. Add the dry ingredients to the wet ingredients and mix gently until no dry flour remains.
7. Spread about half of the red velvet batter into the prepared pan.
8. Spoon half of the cheesecake filling over the batter in small dollops.
9. Add the remaining red velvet batter, then spoon the rest of the cheesecake filling over the top.
10. Use a knife or skewer to gently swirl the cheesecake filling through the red velvet batter.
11. Bake for 50 to 60 minutes, or until the edges are set and the center has a slight wobble.
12. Cool the cake in the pan until it reaches room temperature.
13. Chill for at least 4 hours before slicing.
14. Dust with powdered sugar and add red velvet crumbs before serving, if desired.
Notes
Do not over-swirl the cheesecake filling into the red velvet batter. A few gentle figure-eight motions are enough to create bold ribbons; too much mixing will blur the colors and reduce the marbled look.
- Prep Time: 25 minutes
- Cook Time: 55 minutes
- Category: Dessert
- Method: Baking
- Cuisine: American
Nutrition
- Serving Size: 1 slice
- Calories: 420
- Sugar: 29g
- Sodium: 240mg
- Fat: 25g
- Saturated Fat: 9g
- Unsaturated Fat: 14g
- Trans Fat: 0g
- Carbohydrates: 44g
- Fiber: 1g
- Protein: 6g
- Cholesterol: 95mg
Keywords: Red Velvet Cheesecake Swirl Cake, red velvet cake, cheesecake swirl cake, easy cake recipe, holiday dessert, Valentine’s Day dessert, Christmas dessert, make-ahead dessert