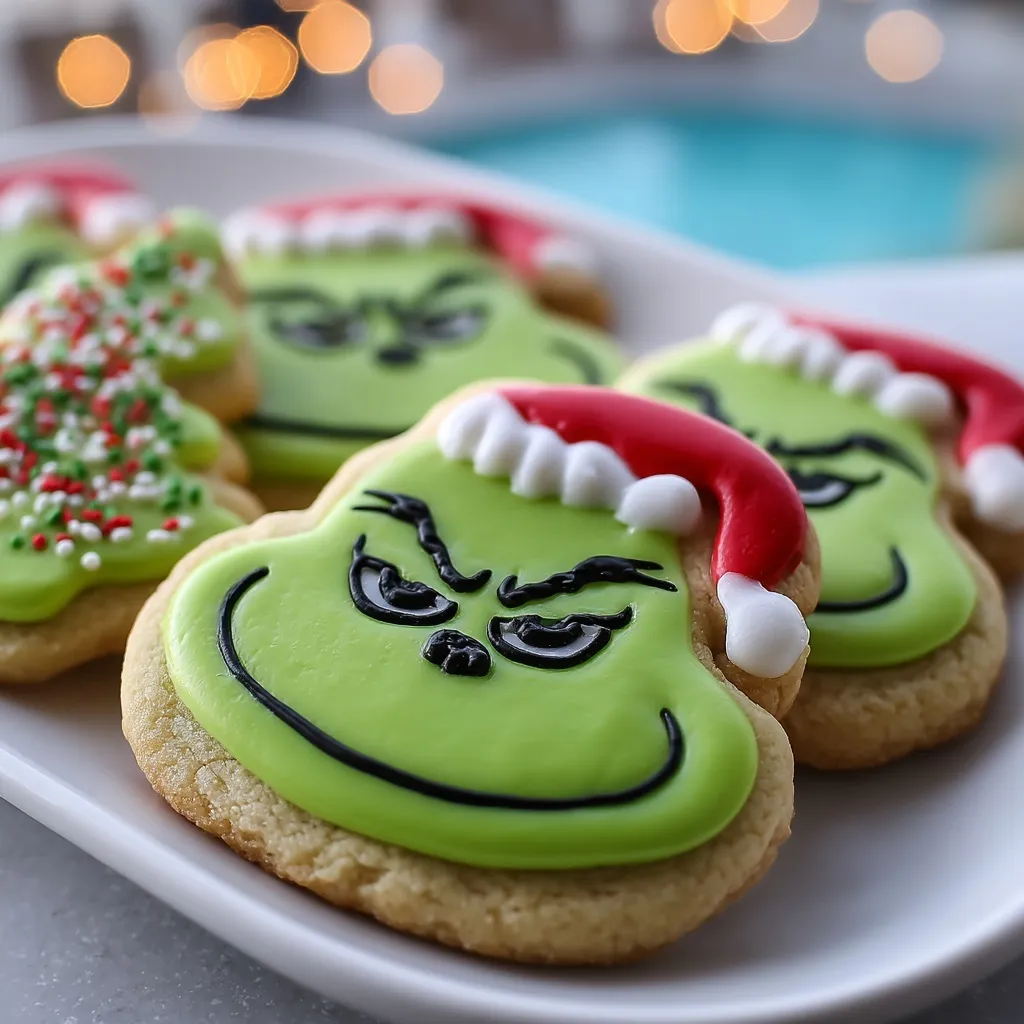
Grinch Cookies Decorated are the kind of holiday treat that instantly makes a cookie tray feel more playful, festive, and memorable. With their bright green icing, mischievous little grin, and Santa hat details, these cookies turn a simple sugar cookie base into a Christmas dessert that gets everyone smiling before they even take a bite.
They are also a wonderful make-ahead option for cookie exchanges, holiday parties, classroom celebrations, and family baking days. The soft cookie base holds up well under the frosting, and the decorating step is easy to customize, whether you want neat Grinch faces or a more homemade, whimsical look that kids can help create.
Why You’ll Love This Grinch Cookies Decorated
These cookies bring together everything people love about holiday baking: bright colors, nostalgic flavors, and a fun decorating project all in one recipe. The sugar cookies are buttery and tender, while the icing adds sweetness and that signature Grinch-inspired look that makes them stand out on any dessert table.
Another reason these Grinch Cookies Decorated are such a hit is that they feel special without being overly complicated. You can bake the cookies ahead of time, frost them once cooled, and decorate at your own pace. They are perfect for gifting, and they photograph beautifully for holiday sharing too.
What Kind of Cookies Work Best for Grinch Cookies Decorated?
A sturdy sugar cookie is usually the best choice for Grinch Cookies Decorated because it bakes up with a smooth surface and holds its shape well. You want a cookie that stays relatively flat, since that makes it much easier to spread the green icing evenly and pipe the facial details on top.
If you already have a favorite rolled or drop sugar cookie recipe, that can work too, as long as it does not puff too much in the oven. The main goal is a soft, tender cookie with enough structure to support the icing and decorations without crumbling when handled.
Ingredients
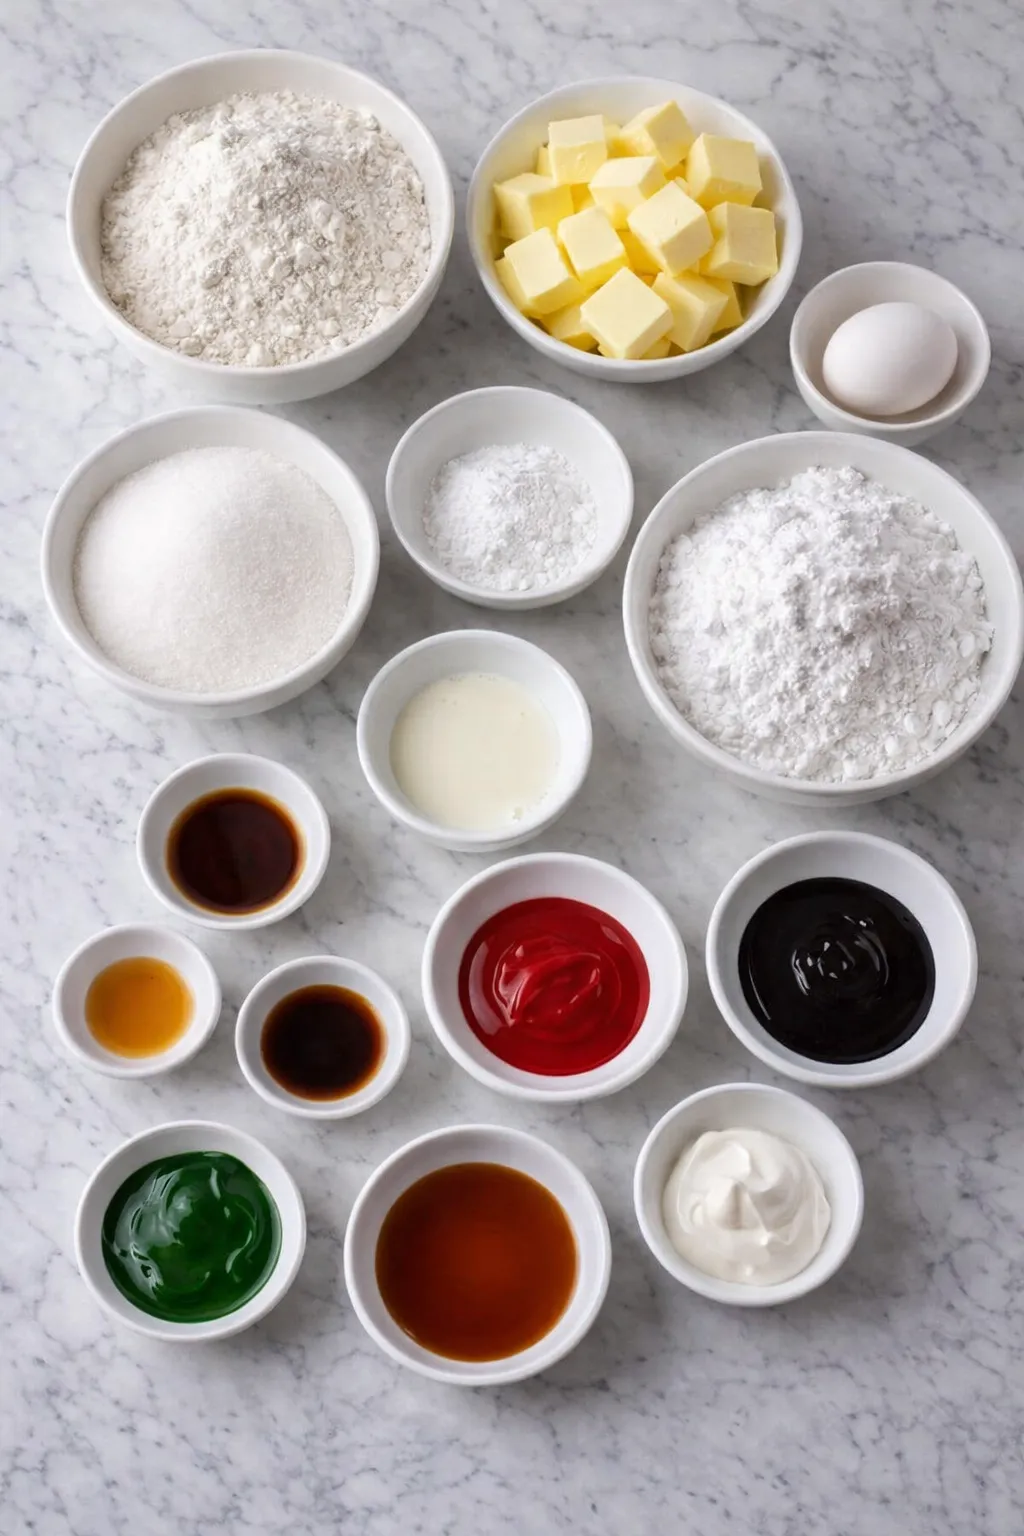
- All-purpose flour: Gives the cookies their structure and helps them hold their shape during baking.
- Baking powder: Adds a light lift so the cookies stay tender instead of dense.
- Salt: Balances the sweetness and rounds out the overall flavor.
- Unsalted butter: Creates a rich, buttery base and gives the cookies a soft texture.
- Granulated sugar: Sweetens the dough and helps create a lightly crisp edge.
- Egg: Binds the dough together and supports the cookie structure.
- Vanilla extract: Adds warm bakery-style flavor that pairs beautifully with sweet icing.
- Almond extract: Optional, but a small amount gives the cookies a classic holiday bakery taste.
- Powdered sugar: Forms the base of the icing for a smooth, pipeable finish.
- Milk: Loosens the icing to the right consistency for spreading and decorating.
- Green food coloring: Creates the signature Grinch face color.
- Red food coloring: Gives the Santa hat its bold festive look.
- Black decorating gel or black royal icing: Helps pipe the eyes, brows, smile, and tiny nose details.
- White icing: Finishes the hat trim and pom-pom for the classic Christmas look.
- Holiday sprinkles: Optional for extra texture and a playful finish on a few cookies.
How To Make the Grinch Cookies Decorated
Grinch Cookies Decorated come together in two simple stages: baking the cookie base and adding the festive character details after cooling. Taking your time with the decorating is what brings the whole look to life.
Step 1: Make the Cookie Dough
Cream the butter and sugar until light and fluffy, then mix in the egg, vanilla extract, and almond extract if using. In a separate bowl, whisk together the flour, baking powder, and salt, then gradually add the dry ingredients to the wet mixture until a soft dough forms.
Step 2: Chill the Dough
Wrap the dough and chill it long enough to firm up. This makes it easier to portion or roll and helps prevent the cookies from spreading too much in the oven.
Step 3: Shape and Bake
Roll or scoop the dough onto prepared baking sheets, leaving space between each cookie. Bake just until the edges are set and the tops look dry. Avoid overbaking, since you want the cookies to stay soft and pale rather than deeply golden.
Step 4: Cool Completely
Let the cookies rest on the baking sheet briefly, then transfer them to a wire rack. The cookies must be completely cool before you add icing, or the decorations can melt and slide.
Step 5: Mix the Icing Colors
Prepare a white icing base and divide it into portions. Tint one portion green for the Grinch faces and another red for the Santa hats. Keep some icing white for the hat trim and pom-poms, then set aside black decorating gel or icing for the facial features.
Step 6: Frost the Grinch Faces
Spread or pipe the green icing over the top of each cookie, shaping it into a rounded Grinch face. Leave a little room near the top edge for the Santa hat so the design looks layered and clear.
Step 7: Add the Santa Hats
Pipe or spoon a curved red hat shape across the top of each green face. Add white trim along the base of the hat and finish with a white pom-pom at the tip.
Step 8: Finish the Facial Details
Use black decorating gel or icing to create arched brows, half-closed eyes, a tiny nose, and that unmistakable Grinch grin. Let the cookies sit until the icing sets before stacking or serving.
How to Serve Grinch Cookies Decorated
These cookies are best served on a holiday dessert platter with other Christmas favorites, and they instantly become a conversation piece because of their festive design. They pair well with hot chocolate, coffee, warm cider, or a simple glass of milk.
This recipe typically feeds about 18 to 24 people, depending on cookie size and whether you are serving them as part of a larger dessert spread. For parties, you can arrange them with plain frosted cookies or peppermint treats to create a colorful holiday cookie board.
How to Store Grinch Cookies Decorated
Once the icing has fully set, store the cookies in a single layer or in gently stacked layers separated by parchment paper inside an airtight container. They usually keep well at room temperature for several days, as long as they are kept in a cool, dry place away from direct sunlight or heat.
For longer storage, you can refrigerate them, though it is best to bring them back to room temperature before serving so the texture is softer and more enjoyable. You can also freeze the undecorated cookies ahead of time, then thaw and decorate them later when you are ready for holiday baking.
Frequently Asked Questions
Can I make Grinch Cookies Decorated ahead of time?
Yes, this is a great make-ahead holiday cookie. You can bake the cookies a day or two in advance and store them in an airtight container until you are ready to decorate. You can also make the dough ahead and chill it overnight.
Do I have to use royal icing?
Not at all. A simple powdered sugar icing works well for a softer, homemade finish, especially if you want an easier decorating process. Royal icing is useful if you want sharper lines and a firmer set for stacking.
How do I keep the icing from running?
The key is making sure the cookies are completely cool and the icing is not too thin. Start with a thicker consistency, then adjust it slowly with a few drops of liquid at a time until it spreads smoothly without dripping off the edges.
Can kids help decorate these cookies?
Absolutely. This is one of the best parts of making Grinch Cookies Decorated. Kids can spread the green icing, place the Santa hats, and add sprinkles, while an adult can handle the finer black facial details if needed.
What other designs can I make with this cookie base?
The same cookie recipe can be used for many holiday ideas beyond Grinch faces. You can turn it into Christmas trees, ornaments, candy cane shapes, or use festive icing colors for a full holiday cookie assortment.
Want More Cookie Ideas?
If you love these Grinch Cookies Decorated, you might also enjoy a few more festive bakes from the site:
- Small Batch Almond Joy Cookies for a chocolate-coconut twist.
- Candy Cane Cookies when you want a classic Christmas cookie look.
- Chocolate Hazelnut Crunch Cookies for a richer, crisp-edged holiday treat.
- No-Bake Samoa Cookies if you want an easy cookie idea without turning on the oven.
Save This Pin For Later
📌 Save this recipe to your Pinterest holiday desserts board so you can come back to it anytime during the Christmas baking season.
And let me know in the comments how yours turned out. Did you go for neat bakery-style details, or did you make them a little sillier and more playful? I always love seeing how different bakers bring character cookies to life.
For even more daily recipe inspiration, visit Life With Livia.
Print Grinch Cookies Decorated
- Total Time: 30 minutes plus chilling
- Yield: 24 cookies
- Diet: Vegetarian
Description
These Grinch Cookies Decorated are a fun and festive Christmas dessert with a soft sugar cookie base, bright green icing, and playful Santa hat details. Perfect for holiday baking, cookie exchanges, dessert boards, and easy recipe ideas, they bring cheerful holiday character to any table and make one of the best sweet food ideas for Christmas parties and family gatherings.
Ingredients
2 3/4 cups all-purpose flour
1 teaspoon baking powder
1/2 teaspoon salt
1 cup unsalted butter, softened
1 cup granulated sugar
1 large egg
2 teaspoons vanilla extract
1/4 teaspoon almond extract
3 cups powdered sugar
3 to 4 tablespoons milk
green food coloring
red food coloring
black decorating gel
white decorating icing
Instructions
1. Preheat the oven to 350°F and line baking sheets with parchment paper.
2. In a medium bowl, whisk together the flour, baking powder, and salt.
3. In a large bowl, beat the butter and granulated sugar until light and fluffy.
4. Mix in the egg, vanilla extract, and almond extract until fully combined.
5. Gradually add the dry ingredients to the wet ingredients and mix until a soft dough forms.
6. Chill the dough for 30 minutes so the cookies hold their shape better while baking.
7. Scoop or shape the dough into rounds and place them on the prepared baking sheets.
8. Bake for 9 to 11 minutes, just until the edges are set and the tops look dry.
9. Let the cookies cool on the pan for a few minutes, then transfer them to a wire rack to cool completely.
10. In a bowl, mix the powdered sugar with milk until a smooth icing forms.
11. Divide the icing into portions and tint one green and one red, leaving a small amount white.
12. Spread or pipe green icing over each cookie to create the Grinch face.
13. Add a red Santa hat shape at the top of each cookie, then pipe white trim and a pom-pom.
14. Use black decorating gel to draw the eyes, brows, nose, and signature Grinch smile.
15. Let the icing set fully before serving or storing.
Notes
Do not decorate the cookies before they are completely cool, or the icing can melt, slide, and lose the clean Grinch design.
- Prep Time: 20 minutes
- Cook Time: 10 minutes
- Category: Dessert
- Method: Baking
- Cuisine: American
Nutrition
- Serving Size: 1 cookie
- Calories: 185
- Sugar: 17g
- Sodium: 65mg
- Fat: 8g
- Saturated Fat: 5g
- Unsaturated Fat: 2g
- Trans Fat: 0g
- Carbohydrates: 27g
- Fiber: 0g
- Protein: 2g
- Cholesterol: 24mg
Keywords: Grinch cookies decorated, Christmas cookies, holiday dessert, easy recipe, sugar cookies, cookie exchange, festive dessert, Christmas party food ideas