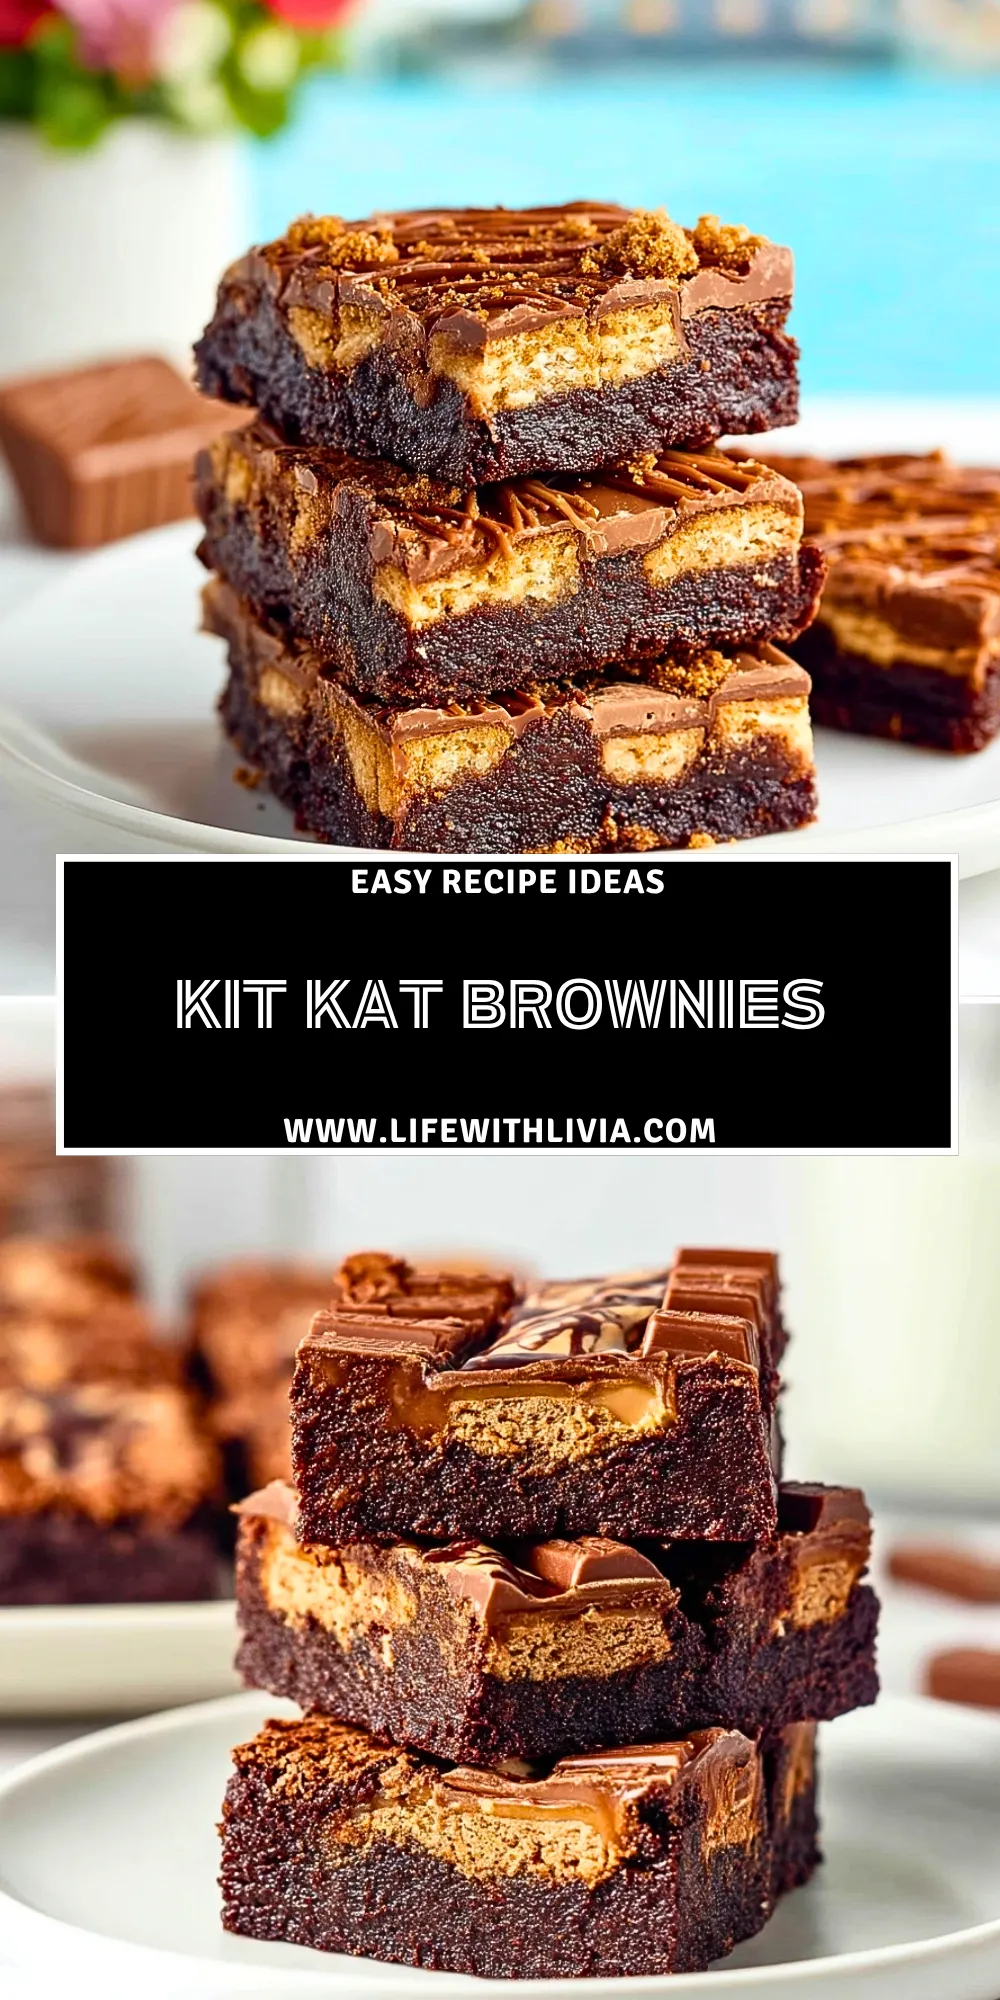
Kit Kat Brownies are the kind of dessert that makes people pause after the first bite. You get a deeply fudgy chocolate brownie base, a crisp candy bar crunch tucked inside, and a creamy chocolate topping that turns simple brownies into a bakery-style treat.
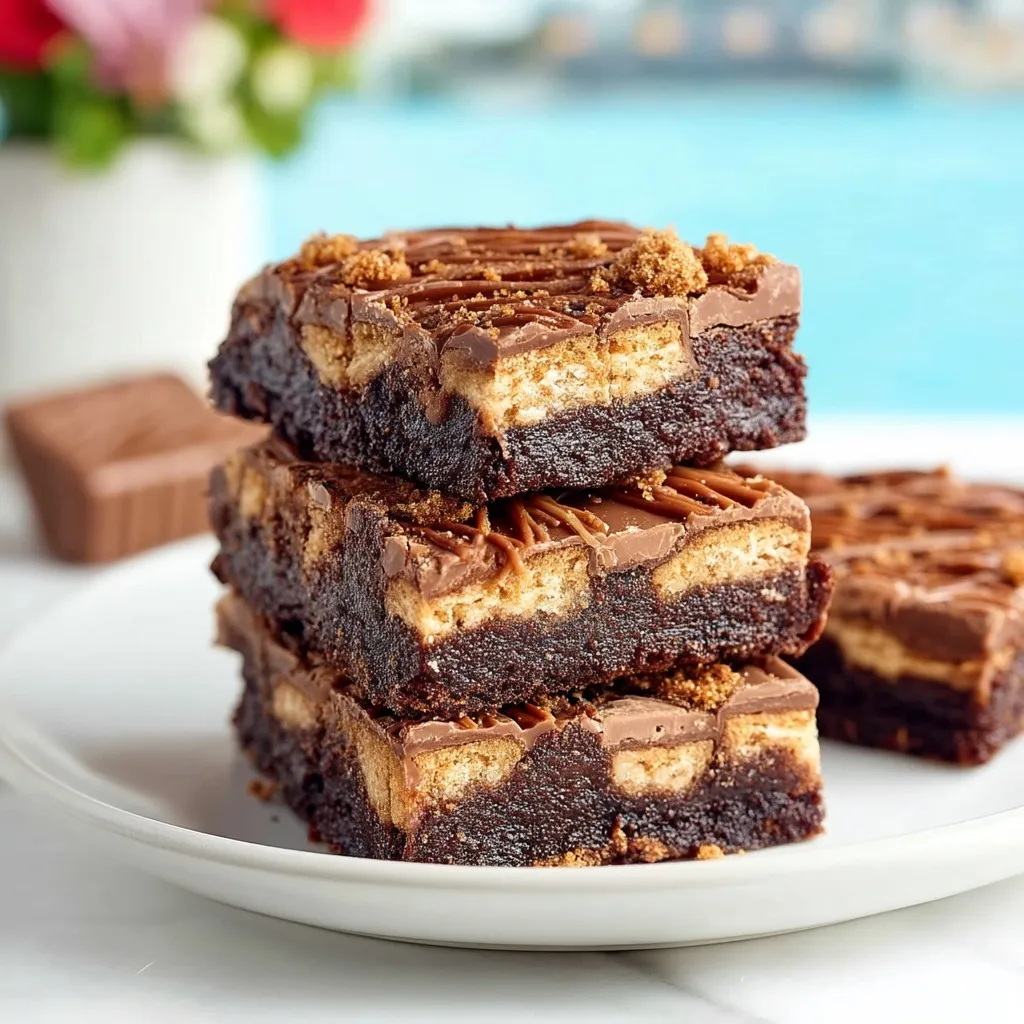
They are playful enough for birthdays, bake sales, movie nights, and after-school snacks, but rich enough to serve as a party dessert. The best part is the contrast: soft brownie, snappy wafer layers, smooth melted chocolate, and just enough crumbs on top to make every square feel extra special.
Why You’ll Love This Kit Kat Brownies
These brownies bring together two favorite chocolate treats in one pan. The brownie layer stays dense and chewy, while the Kit Kat pieces add that signature wafer crunch that makes each bite more interesting than a plain brownie.
They also look impressive without needing advanced decorating skills. Once the brownies cool, a simple chocolate topping and a few crushed candy pieces create that pretty layered look. They slice beautifully when chilled, travel well, and always feel like something fun and unexpected on a dessert table.
What Kind of Kit Kats Should I Use?
Classic milk chocolate Kit Kats are the easiest choice because they melt into the chocolate flavor without overpowering the brownies. They give you the familiar wafer crunch and sweet candy bar flavor most people expect.
You can also use dark chocolate Kit Kats if you want the brownies to taste less sweet and more intense. Mini Kit Kats are convenient for layering, while full-size bars work well when broken into sections. Avoid using very soft or melted candy bars because they can make the middle layer messy instead of crisp.
Ingredients
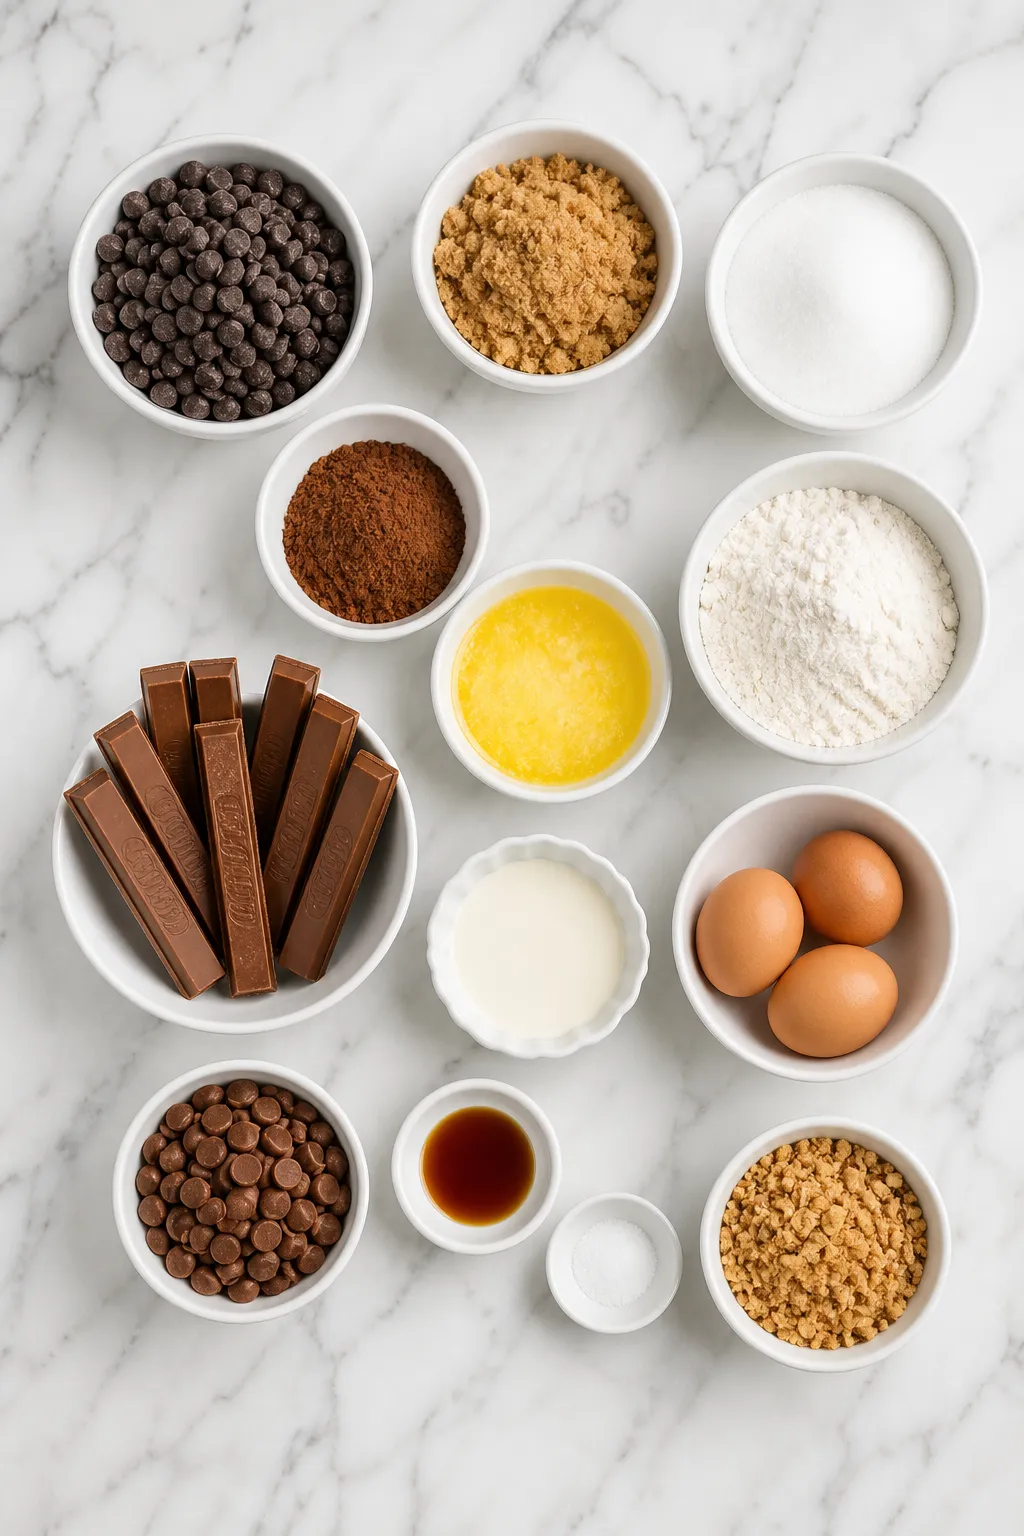
Before you start baking, gather everything so the brownie batter comes together smoothly and the candy bars are ready for layering. This section explains what each ingredient does in the dessert, while the exact amounts are saved for the printable recipe card below.
- Unsalted butter — Gives the brownies richness, moisture, and a fudgy texture.
- Granulated sugar — Sweetens the batter and helps create a shiny, crackly brownie top.
- Brown sugar — Adds deeper caramel notes and keeps the center soft and chewy.
- Eggs — Provide structure and help the brownies set without becoming dry.
- Vanilla extract — Rounds out the chocolate flavor and adds warmth.
- Unsweetened cocoa powder — Builds a bold chocolate base for the brownie layer.
- All-purpose flour — Gives the brownies enough structure to slice cleanly.
- Salt — Balances the sweetness and makes the chocolate taste stronger.
- Semi-sweet chocolate chips — Add pockets of melted chocolate throughout the brownies.
- Kit Kat bars — Create the crunchy wafer candy layer that makes these brownies special.
- Milk chocolate — Melts into a smooth topping that matches the candy bar flavor.
- Heavy cream — Helps the chocolate topping turn glossy and spreadable.
- Crushed cookie crumbs or wafer crumbs — Add texture and a finished bakery-style look on top.
How To Make the Kit Kat Brownies
These brownies are made in layers, but the process is still simple. The key is to avoid overmixing the batter and to let the brownies cool well before slicing so the candy and chocolate topping can set neatly.
Step 1: Prepare the Pan
Line a square baking pan with parchment paper, leaving a little overhang on the sides. This makes it easier to lift the brownies out after they cool. Lightly grease the parchment so the fudgy edges release cleanly.
Step 2: Melt the Butter and Build the Chocolate Base
Melt the butter until smooth, then whisk it with the granulated sugar and brown sugar. Add the eggs and vanilla, whisking until the mixture looks glossy. This helps create that dense brownie texture with a slightly shiny top.
Step 3: Add the Dry Ingredients
Sift in the cocoa powder, flour, and salt. Fold gently with a spatula just until no dry streaks remain. Stop mixing as soon as the batter comes together because overmixing can make brownies cakier instead of fudgy.
Step 4: Fold in Chocolate Chips
Stir in the semi-sweet chocolate chips. They melt slightly as the brownies bake, giving the inside extra richness and small pockets of chocolate in every square.
Step 5: Layer the Batter and Kit Kats
Spread half of the brownie batter into the prepared pan. Arrange Kit Kat pieces over the batter in an even layer, leaving a little space near the edges so the brownies hold together when sliced. Spoon the remaining batter over the candy bars and gently smooth the top.
Step 6: Bake Until Just Set
Bake until the edges look firm and the center is set but still slightly soft. A toothpick should come out with moist crumbs, not wet batter. Do not wait for a completely clean toothpick, or the brownies may turn dry.
Step 7: Cool Completely
Let the brownies cool in the pan before adding the topping. Warm brownies can melt the candy layer too much and make the top slide around, so patience really helps here.
Step 8: Add the Chocolate Topping
Melt the milk chocolate with heavy cream until smooth and glossy. Spread it over the cooled brownies, then sprinkle crushed wafer crumbs or cookie crumbs on top. Chill briefly so the topping firms up before slicing into clean squares.
Best Ways to Serve Kit Kat Brownies
Kit Kat Brownies are rich, so small squares go a long way. One pan usually feeds 12 to 16 people, depending on how large you cut the pieces. For parties or dessert trays, cut them into smaller bite-size squares so guests can enjoy them alongside other treats.
Serve them slightly chilled for the cleanest layers and the most noticeable candy crunch. For a softer, gooier bite, let the brownies sit at room temperature for 15 to 20 minutes before serving. They are delicious with a cold glass of milk, hot coffee, vanilla ice cream, or a drizzle of chocolate sauce.
How to Store Kit Kat Brownies
Store the brownies in an airtight container at room temperature for up to 2 days if your kitchen is cool. Place parchment between layers so the chocolate topping does not stick to other pieces.
For longer storage, refrigerate them for up to 5 days. Chilling helps the topping stay firm and keeps the Kit Kat layer from getting too soft. Let the brownies rest at room temperature for a few minutes before serving if you prefer a softer texture.
You can also freeze Kit Kat Brownies for up to 2 months. Wrap individual squares tightly in plastic wrap, then place them in a freezer-safe bag or container. Thaw overnight in the refrigerator, then bring them to room temperature before serving. Freezing may soften the wafer slightly, but the brownies will still taste rich and chocolatey.
Frequently Asked Questions
Can I use boxed brownie mix for Kit Kat Brownies?
Yes, boxed brownie mix works well when you want a shortcut. Choose a fudgy brownie mix rather than a cake-style one, then layer the Kit Kats in the middle before baking. Follow the package instructions for the batter, but keep an eye on baking time because the candy layer can make the center take a little longer to set.
How do I keep the Kit Kats crunchy inside the brownies?
The candy bars will soften slightly as they bake, but you can keep more texture by using whole Kit Kat sections instead of tiny chopped pieces. Let the brownies cool completely before covering them, and store them in an airtight container once cooled. Refrigerating after the topping sets can also help the wafer layer stay firmer.
Can I add peanut butter or caramel?
Yes, both work beautifully with these brownies. A thin drizzle of peanut butter over the Kit Kat layer adds a salty-sweet flavor, while caramel creates a gooier candy bar-style center. Keep the layer light so the brownies still bake evenly and do not become too soft in the middle.
Why did my brownies fall apart when I sliced them?
They were likely too warm, or the topping had not fully set. Fudgy brownies need cooling time, especially when they contain a candy layer. For sharp slices, chill the pan for about 30 minutes, lift the brownies out with the parchment, and cut with a clean knife, wiping the blade between cuts.
Can I make these brownies ahead of time?
Absolutely. Kit Kat Brownies are great for making a day ahead because the layers firm up and slice even better after chilling. Bake and cool them, add the topping, then refrigerate until ready to serve. For the freshest texture, slice them the day you plan to share them.
Want More Brownie and Chocolate Dessert Ideas?
If these Kit Kat Brownies sound like your kind of dessert, you’ll probably enjoy these other sweet treats from the blog:
- Red Velvet Cheesecake Brownies for a dramatic chocolate-and-cream-cheese swirl.
- Pumpkin Cheesecake Swirl Brownies when you want cozy spice with a fudgy base.
- Healthy Cottage Cheese Protein Brownies for a lighter chocolate snack with extra protein.
- Easy Vegan Brownies if you need a dairy-free dessert option.
Save This Pin For Later
📌 Save this Kit Kat Brownies idea to your Pinterest dessert board so you can come back to it whenever a chocolate craving hits.
And let me know in the comments how yours turned out. Did you use classic Kit Kats, dark chocolate Kit Kats, or add caramel in the middle?
I love seeing how readers make these desserts their own. For even more daily recipe inspiration, follow Life With Livia on Pinterest.
Print Kit Kat Brownies
- Total Time: 55 minutes
- Yield: 16 brownies
- Diet: Vegetarian
Description
These Kit Kat Brownies are rich, fudgy, crunchy, and perfect for anyone who loves easy dessert recipes with a candy bar twist. With a chewy chocolate brownie base, a crisp Kit Kat wafer layer, and a smooth chocolate topping, this easy recipe is a fun party dessert, bake sale treat, chocolate snack, and sweet food idea for birthdays, holidays, or weekend baking.
Ingredients
1 cup unsalted butter, melted
1 cup granulated sugar
3/4 cup brown sugar, packed
3 large eggs
2 teaspoons vanilla extract
1 cup unsweetened cocoa powder
1 cup all-purpose flour
1/2 teaspoon salt
1 cup semi-sweet chocolate chips
12 full-size Kit Kat bars, divided
1 1/2 cups milk chocolate chips
1/3 cup heavy cream
1/4 cup crushed wafer crumbs or cookie crumbs
Instructions
1. Preheat the oven to 350°F and line a 9×9-inch baking pan with parchment paper. Lightly grease the parchment.
2. In a large bowl, whisk melted butter, granulated sugar, and brown sugar until smooth.
3. Add eggs and vanilla extract, then whisk until glossy and fully combined.
4. Sift in cocoa powder, flour, and salt. Fold gently until the batter comes together.
5. Stir in semi-sweet chocolate chips.
6. Spread half of the brownie batter into the prepared pan.
7. Arrange 8 Kit Kat bars over the batter in an even layer.
8. Spoon the remaining brownie batter over the Kit Kats and smooth the top gently.
9. Bake for 32 to 38 minutes, or until the edges are set and the center has moist crumbs.
10. Let the brownies cool completely in the pan.
11. Melt milk chocolate chips with heavy cream until smooth, then spread over the cooled brownies.
12. Chop the remaining Kit Kat bars and sprinkle them over the top with wafer crumbs.
13. Chill for 30 minutes before slicing into squares.
Notes
Do not overbake the brownies. Pull them from the oven when the center still has moist crumbs, because they will continue to set as they cool and will stay fudgy instead of dry.
- Prep Time: 20 minutes
- Cook Time: 35 minutes
- Category: Dessert
- Method: Baking
- Cuisine: American
Nutrition
- Serving Size: 1 brownie
- Calories: 385
- Sugar: 35g
- Sodium: 115mg
- Fat: 22g
- Saturated Fat: 13g
- Unsaturated Fat: 8g
- Trans Fat: 0g
- Carbohydrates: 48g
- Fiber: 3g
- Protein: 5g
- Cholesterol: 65mg
Keywords: Kit Kat Brownies, candy bar brownies, easy dessert recipe, fudgy brownies, chocolate dessert, bake sale treats