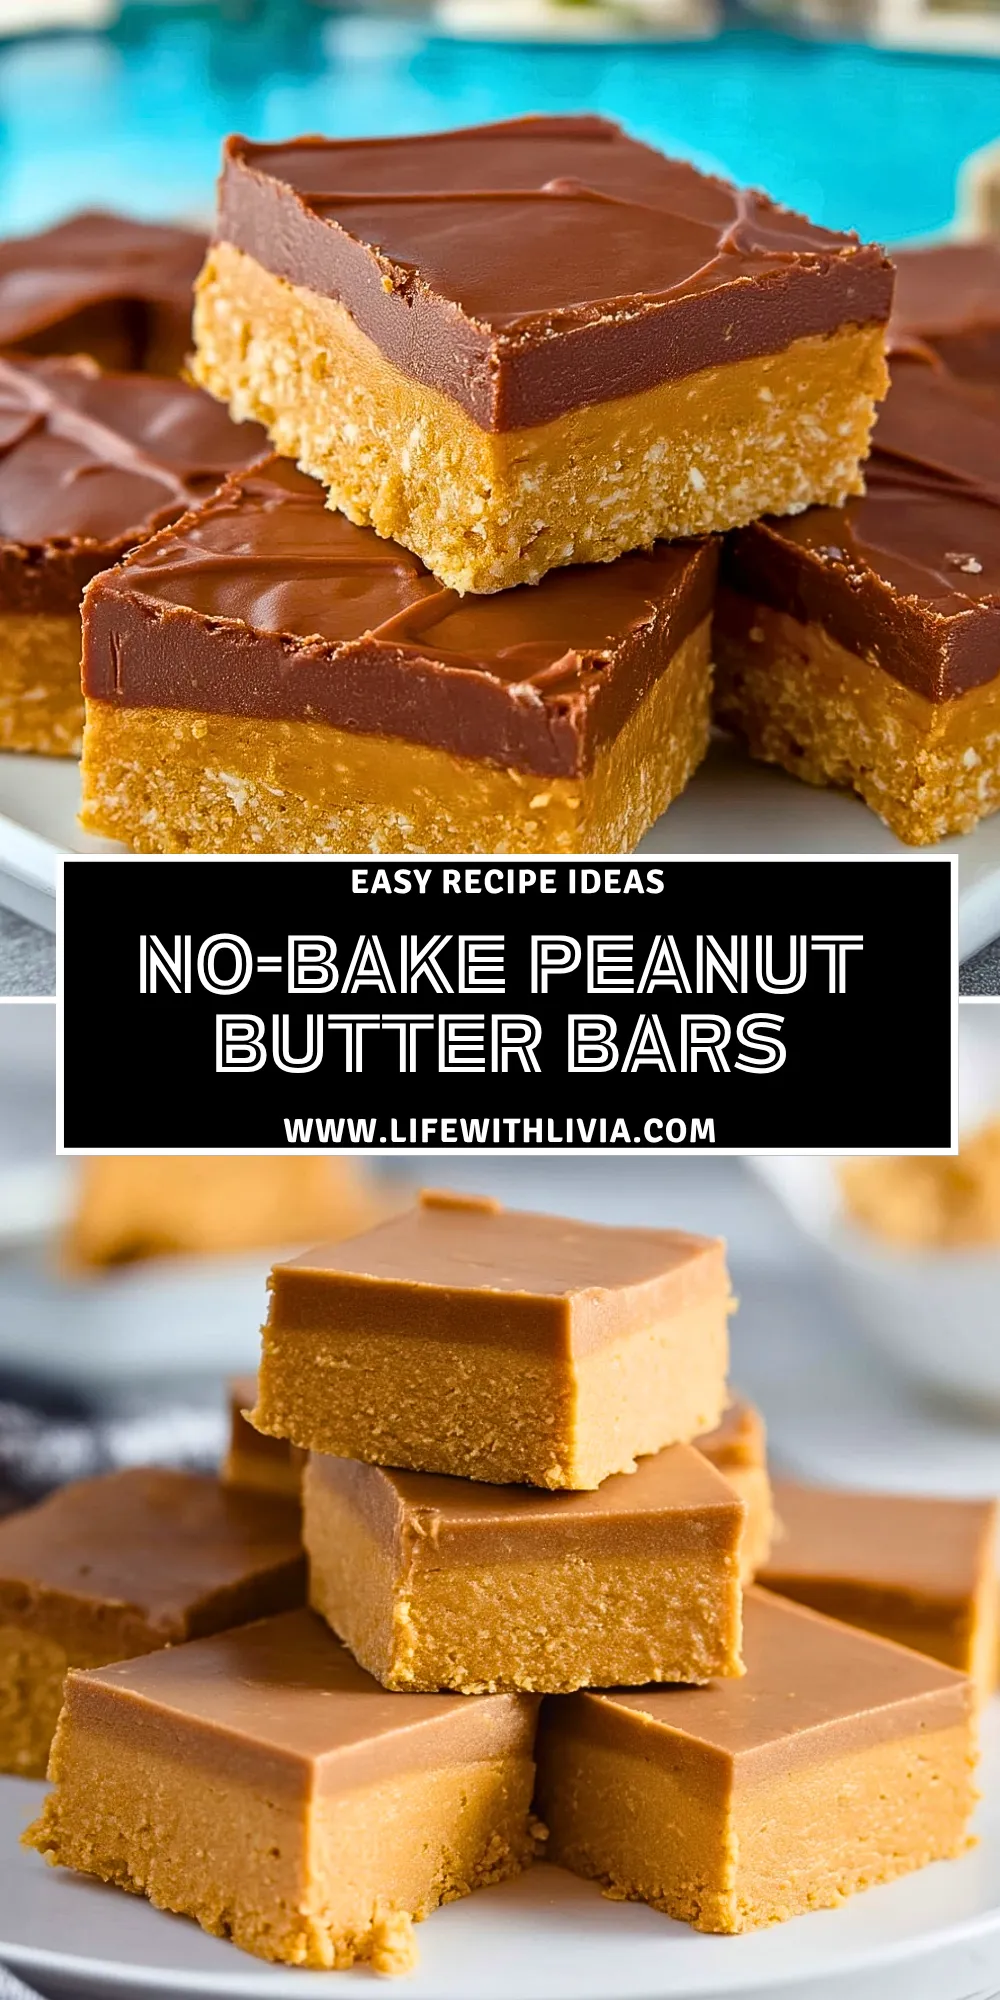
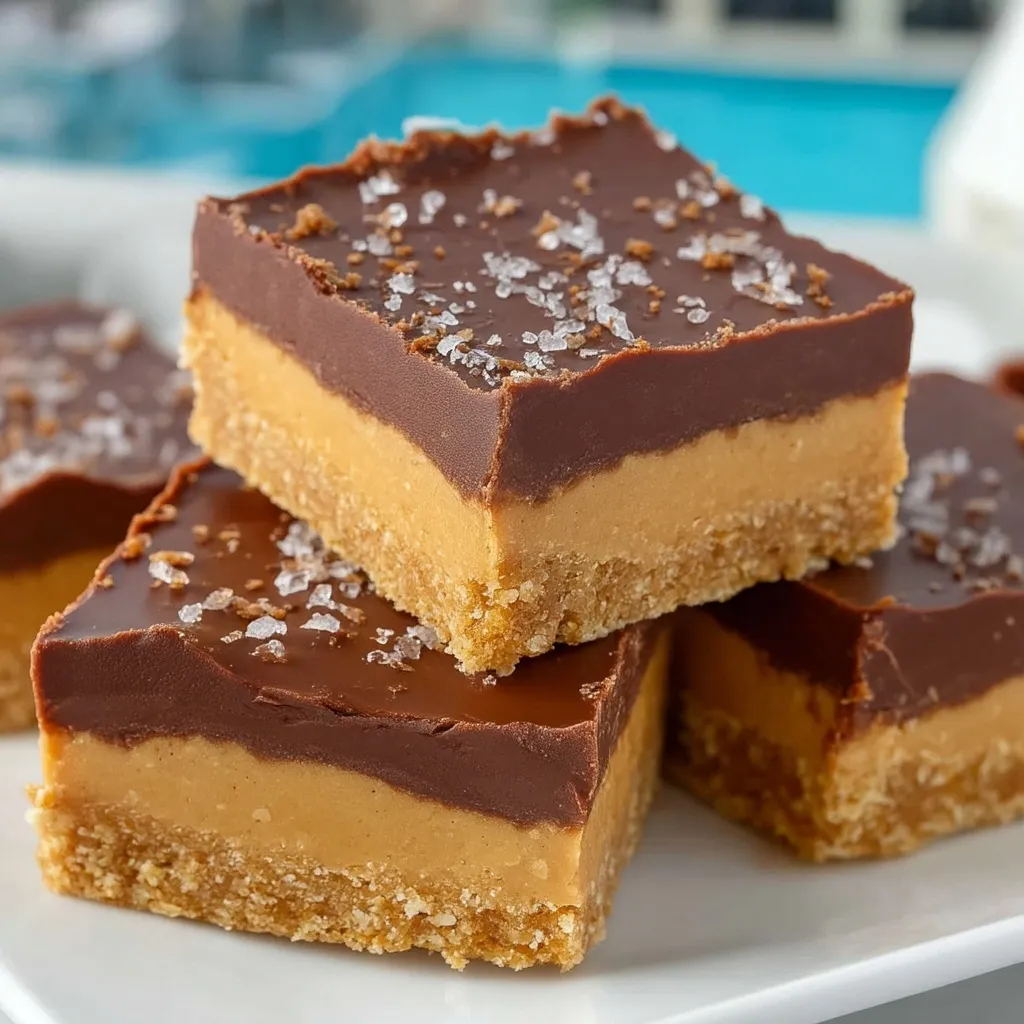
No-Bake Peanut Butter Bars are the kind of dessert that feels like a little square of comfort: buttery, peanut-buttery, chocolate-topped, and wonderfully simple. They have a soft, sweet base that tastes almost like the inside of a peanut butter cup, finished with a smooth chocolate layer that sets into a clean, sliceable topping.
This is a perfect treat when you want something homemade without turning on the oven. The bars chill in the fridge until firm, making them great for parties, lunchbox desserts, potlucks, holidays, or those evenings when a quick chocolate peanut butter dessert sounds impossible to resist.
Why You’ll Love These No-Bake Peanut Butter Bars
These bars are rich, nostalgic, and easy enough for a beginner. The no-bake method keeps the process simple, while the combination of peanut butter, graham cracker crumbs, powdered sugar, butter, and chocolate gives every bite a balance of creamy, crumbly, sweet, and smooth.
They also slice beautifully once chilled, so they look polished with very little effort. You can make them ahead, store them cold, and bring them out whenever you need a quick dessert that tastes like it came from a bakery tray.
What Kind of Peanut Butter Works Best for No-Bake Peanut Butter Bars?
Creamy shelf-stable peanut butter works best because it gives the filling a smooth texture and helps the bars hold their shape. Natural peanut butter can separate and may make the base oily or too soft unless it is very well stirred and thick.
A classic creamy peanut butter gives these bars their familiar candy-like flavor. Crunchy peanut butter can also work if you enjoy little peanut pieces in the base, but the finished bars will be less smooth and slightly more textured.
Ingredients
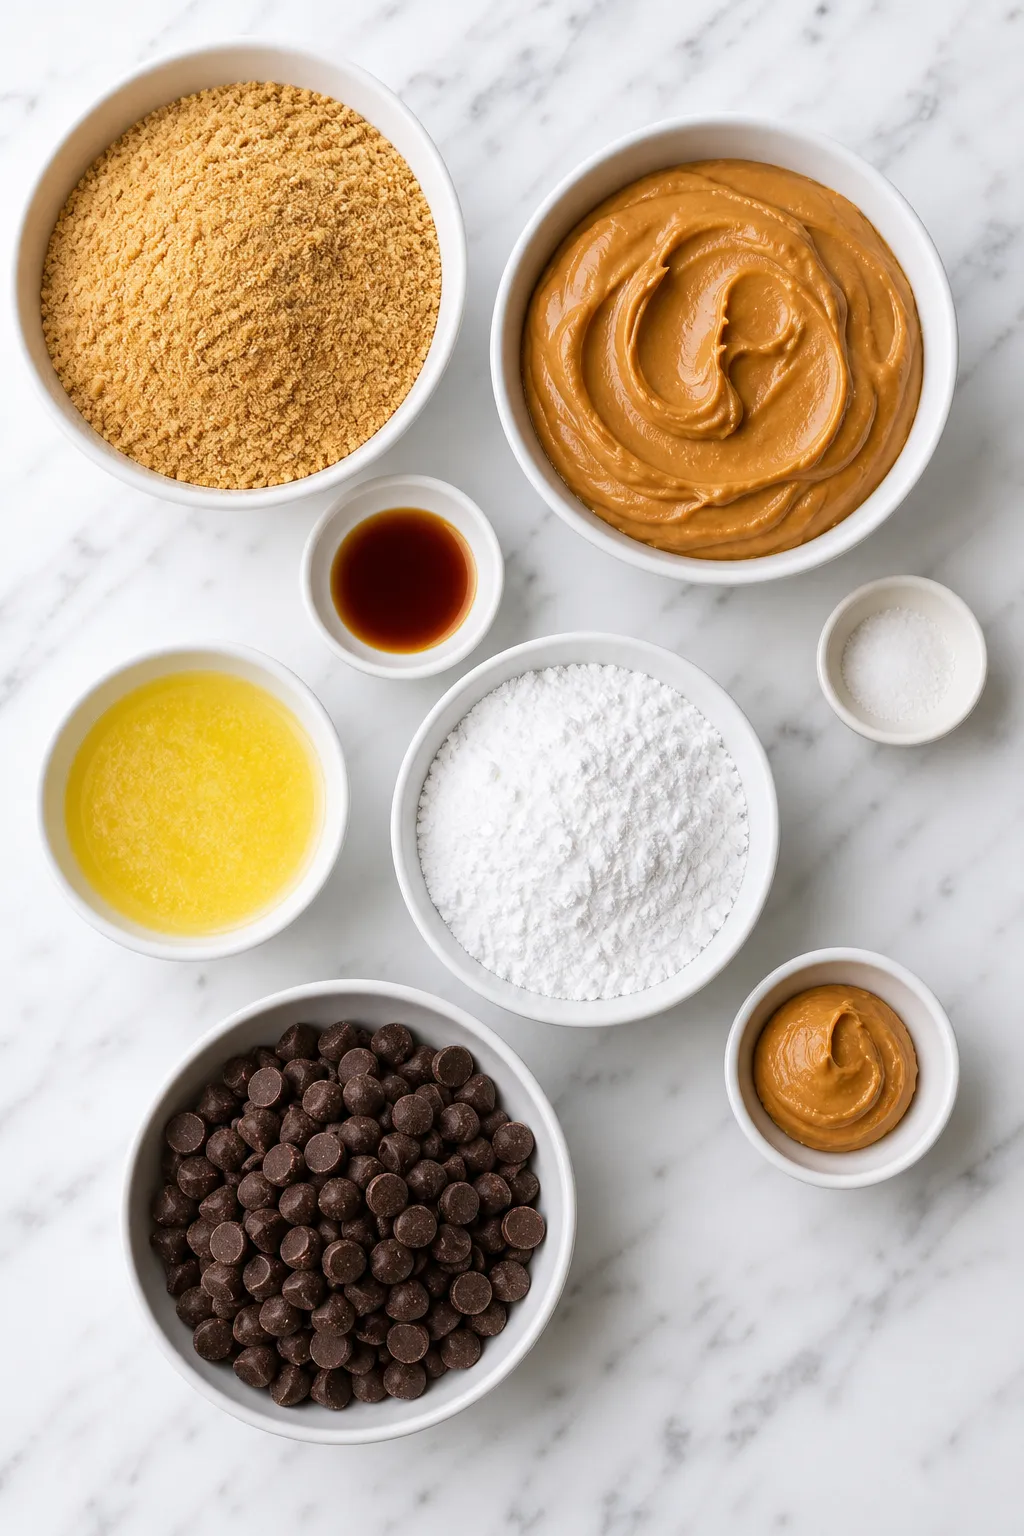
Each ingredient plays an important role in building the layers, texture, and flavor of these no-bake dessert bars. The exact amounts belong in the recipe card, but this overview helps you understand why every item matters.
- Graham cracker crumbs — Create the soft, slightly crumbly structure for the peanut butter base and add a gentle honeyed flavor.
- Creamy peanut butter — Gives the bars their rich peanut flavor and helps bind the filling into a smooth layer.
- Unsalted butter — Adds richness and helps the base firm up once chilled.
- Powdered sugar — Sweetens the bars while keeping the filling soft and candy-like instead of gritty.
- Vanilla extract — Rounds out the peanut butter flavor with a warm bakery-style note.
- Semi-sweet chocolate chips — Melt into the smooth top layer and balance the sweetness of the peanut butter base.
- Peanut butter for the chocolate layer — Softens the chocolate topping slightly so it slices more cleanly.
- Fine salt — Sharpens the sweet flavors and keeps the bars from tasting flat.
How To Make the No-Bake Peanut Butter Bars
The process is simple, but the best results come from pressing the base firmly, melting the topping gently, and giving the bars enough time to chill before slicing.
Step 1: Prepare the Pan
Line a square baking pan with parchment paper, leaving a little overhang on the sides. This makes it much easier to lift the chilled bars out in one piece and cut clean squares later.
Step 2: Mix the Peanut Butter Base
In a large bowl, combine the graham cracker crumbs, powdered sugar, melted butter, creamy peanut butter, vanilla, and salt. Stir until everything is evenly moistened and the mixture looks thick, soft, and slightly crumbly.
Step 3: Press the Base Firmly
Transfer the peanut butter mixture into the lined pan. Press it into an even layer using a spatula, the bottom of a measuring cup, or clean hands. Take your time here because a firmly packed base gives the bars their best texture and prevents crumbling.
Step 4: Melt the Chocolate Topping
Add the chocolate chips and a spoonful of peanut butter to a microwave-safe bowl. Heat in short bursts, stirring between each one, until the chocolate is smooth and glossy. Avoid overheating because chocolate can seize or turn grainy when it gets too hot.
Step 5: Spread the Chocolate Layer
Pour the melted chocolate mixture over the peanut butter base. Spread it evenly to the edges with an offset spatula or the back of a spoon. A smooth top makes the finished bars look extra pretty once sliced.
Step 6: Chill Until Firm
Refrigerate the pan until the chocolate has set and the base is firm. The bars should feel solid enough to lift from the pan without bending.
Step 7: Slice and Serve
Use the parchment paper to lift the bars out of the pan. For cleaner cuts, let them sit at room temperature for a few minutes, then slice with a sharp knife. Wipe the knife between cuts for neat edges.
How to Serve No-Bake Peanut Butter Bars
These No-Bake Peanut Butter Bars are rich, so small squares go a long way. One standard pan usually feeds about 16 people when cut into dessert-size bars, or fewer if you prefer larger bakery-style squares.
Serve them chilled for a firmer bite, or let them sit at room temperature for a few minutes if you like a softer, creamier texture. They pair beautifully with coffee, cold milk, hot cocoa, or a scoop of vanilla ice cream for a simple dessert plate.
For parties, arrange the bars on a chilled platter and separate layers with parchment if you stack them. A tiny sprinkle of flaky salt on top before the chocolate sets can make them feel a little more grown-up and balances the sweetness nicely.
How to Store No-Bake Peanut Butter Bars
Store the bars in an airtight container in the refrigerator. They keep well for about 5 to 7 days and stay firm, fudgy, and fresh-tasting when kept cold.
For longer storage, freeze them in a sealed freezer-safe container for up to 2 months. Place parchment paper between layers so the chocolate tops do not stick together. Thaw them in the refrigerator overnight, or let individual bars sit at room temperature for a short time before serving.
Avoid storing these bars in a warm kitchen for too long. The chocolate can soften, and the peanut butter base may become too tender to hold its shape. For the cleanest texture, keep them chilled until close to serving time.
Frequently Asked Questions
Can I use natural peanut butter?
You can, but classic creamy peanut butter usually gives better structure. Natural peanut butter often has more oil separation, which can make the bars softer or slightly greasy. If using natural peanut butter, stir it extremely well and choose a thick variety rather than a runny one.
Why are my No-Bake Peanut Butter Bars crumbly?
Crumbly bars usually mean the base was not pressed firmly enough, the mixture was too dry, or the bars were sliced before chilling completely. Press the base tightly into the pan and give it enough time in the refrigerator so the butter and peanut butter can firm up.
How do I keep the chocolate from cracking when I slice the bars?
Let the chilled bars sit at room temperature for a few minutes before cutting. Use a sharp knife and press down cleanly instead of sawing back and forth. Adding a little peanut butter to the melted chocolate also helps create a softer topping that slices more smoothly.
Can I make these bars gluten-free?
Yes, use gluten-free graham crackers or gluten-free cookie crumbs for the base. Make sure the chocolate chips and other packaged ingredients are labeled gluten-free if you are serving someone with a gluten sensitivity or allergy.
Can I make No-Bake Peanut Butter Bars ahead of time?
Absolutely. These bars are a great make-ahead dessert because they need time to chill. You can prepare them the day before serving, keep them covered in the refrigerator, and slice them when ready. They also freeze well, which makes them handy for holiday trays or last-minute dessert cravings.
Want More No-Bake Dessert Ideas?
If these No-Bake Peanut Butter Bars are your kind of easy treat, you’ll probably enjoy these other sweet ideas from the kitchen:
- No-Bake Pecan Pie Balls for a bite-size holiday treat with nutty sweetness.
- No-Bake Samoa Cookies when you want chocolate, coconut, and caramel flavor without baking.
- Chocolate Peanut Butter Haystacks for a crunchy chocolate peanut butter candy-style dessert.
- No-Bake Classic Woolworth Cheesecake if you love creamy chilled desserts with an old-fashioned feel.
For even more daily dessert inspiration and cozy homemade food ideas, follow Life With Livia on Pinterest.
Save This Pin For Later
📌 Save these No-Bake Peanut Butter Bars to your Pinterest dessert board so you can find them whenever a chocolate peanut butter craving hits.
And let me know in the comments how yours turned out. Did you use creamy or crunchy peanut butter? Did you add flaky salt, chopped peanuts, or extra chocolate on top?
I love hearing how others make these recipes their own. Questions are welcome too—let’s help each other make simple desserts even better.
Print No-Bake Peanut Butter Bars
- Total Time: 2 hours 15 minutes
- Yield: 16 bars
- Diet: Vegetarian
Description
These No-Bake Peanut Butter Bars are a quick dessert made with a buttery graham cracker peanut butter base and a smooth chocolate topping that sets beautifully in the fridge. This easy recipe is perfect for no-bake dessert ideas, party treats, lunchbox sweets, holiday food ideas, and simple homemade snacks when you want rich chocolate peanut butter flavor without using the oven.
Ingredients
1 1/2 cups graham cracker crumbs
1 cup creamy peanut butter
1/2 cup unsalted butter, melted
1 3/4 cups powdered sugar
1 teaspoon vanilla extract
1/4 teaspoon fine salt
1 1/2 cups semi-sweet chocolate chips
1/4 cup creamy peanut butter for the chocolate topping
Instructions
1. Line an 8-inch square pan with parchment paper, leaving extra paper over the sides for easy lifting.
2. In a large mixing bowl, stir together graham cracker crumbs, powdered sugar, melted butter, peanut butter, vanilla extract, and salt until evenly combined.
3. Press the peanut butter mixture firmly into the prepared pan, smoothing it into an even layer.
4. Add chocolate chips and the remaining peanut butter to a microwave-safe bowl.
5. Microwave in 20-second intervals, stirring after each interval, until the chocolate is fully melted and smooth.
6. Pour the melted chocolate mixture over the peanut butter base and spread it evenly to the edges.
7. Refrigerate for at least 2 hours, or until the bars are firm and the chocolate topping is set.
8. Lift the bars from the pan using the parchment paper, let them sit for a few minutes, then slice into squares.
Notes
Do not skip firmly pressing the peanut butter base into the pan. A loosely packed base can crumble when sliced, while a compact layer gives the bars clean edges and the best texture.
- Prep Time: 15 minutes
- Cook Time: 0 minutes
- Category: Dessert
- Method: No-Bake
- Cuisine: American
Nutrition
- Serving Size: 1 bar
- Calories: 285
- Sugar: 22g
- Sodium: 115mg
- Fat: 18g
- Saturated Fat: 8g
- Unsaturated Fat: 9g
- Trans Fat: 0g
- Carbohydrates: 29g
- Fiber: 2g
- Protein: 6g
- Cholesterol: 15mg
Keywords: No-Bake Peanut Butter Bars, peanut butter bars, chocolate peanut butter dessert, easy no-bake dessert, no-bake bars, quick dessert, party treats, holiday dessert, food ideas